MooseCI is easy to use. You can run it locally with Docker, or on every pull request with the GitHub Action. You only need a configuration file and a small workflow.
Analyzing source code starts with parsing and for this you need semantic understanding of how symbols in the code relate to each other.
In this post, we’ll walk through how to build a C code importer using the TreeSitterFamixIntegration framework.
The TreeSitterFamixIntegration stack provides tools to ease the development of Famix importers using tree-sitter.
This package offers some great features for parsing such as (but not limited to):
Useful methods for source management (getting source text, positions, setting sourceAnchor of a famix entity).
Error handling to help catch and report parsing issues
a better TreeSitter node inspector (which is very helpful when debugging)
Utility to efficiently import and attach single-line and multi-line comments to their corresponding entities.
Context tracking for symbol scope (no more context push and pop 😁)
There is a detailed documentation you can check that explain every features.
First, we need to load the C metamodel. This metamodel provides the Famix classes that represent C entities such as functions, structs, variables, etc.
The FamixCimporter class is the entry point for our importer. It will handle the parsing of C files into Abstract Syntax Trees (AST).
This class will inherit from FamixTSAbstractImporter (defined in the TreeSitterFamixIntegration project), which provides the necessary methods for importing and parsing C files using Tree-sitter.
FamixTSAbstractImporter <<#FamixCImporter
slots: {};
package: 'Famix-C-Importer'
Now, let’s override some methods to set up our importer:
"Should return a TreeSitter language such as TSLanguage python"
^ TSLanguage cLang
This method returns the Tree-sitter language we want to use for parsing. In this case, we are using the C language. You can find the available languages in the Pharo-Tree-Sitter package.
This method calls importFile: on all C files recursively found in a directory.
We will add more logic to this method later but for now, it serves as a starting point for our importer.
The isCFile: method checks if the file has a .c or .h extension.
FamixCImporter >> isCFile: aFileReferencemon
^#( 'c''h' ) includes: aFileReference extension
The importFile: method is defined in the FamixTSAbstractImporter class (provided by the TreeSitter-Famix-Integration project).
It parses the file content to create an AST and then passes the visitor (the FamixCVisitor that we previously defined) to walk through the AST.
The FamixCVisitor class is responsible for walking through the parsed AST and creating Famix entities. It will inherit from FamixTSAbstractVisitor, which provides the necessary methods for visiting Tree-sitter nodes.
FamixTSAbstractVisitor <<#FamixCVisitor
slots: {};
package: 'Famix-C-Importer'
For this class, we will just need to override one method:
It returns the Famix metamodel class that will be used to create Famix entities. In this case, we are using FamixCModel which is in the Famix-Cpp package.
Now that we have our importer and visitor classes set up, we can already test it.
To test our importer, we can create a simple C file and import it using the FamixCImporter class.
test.c
#include<stdio.h>
int aGlobalVar =1;
intmain() {
int aLocalVar;
aLocalVar = aGlobalVar +2;
}
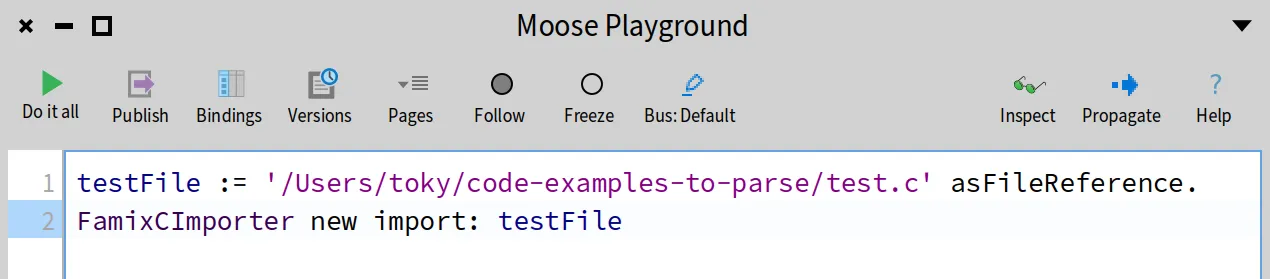
To import this file, we can use the following code in the Playground (cmd + O + P to open it):
Before running the above code, open the Transcript to see the logs (cmd + O + T to open it).
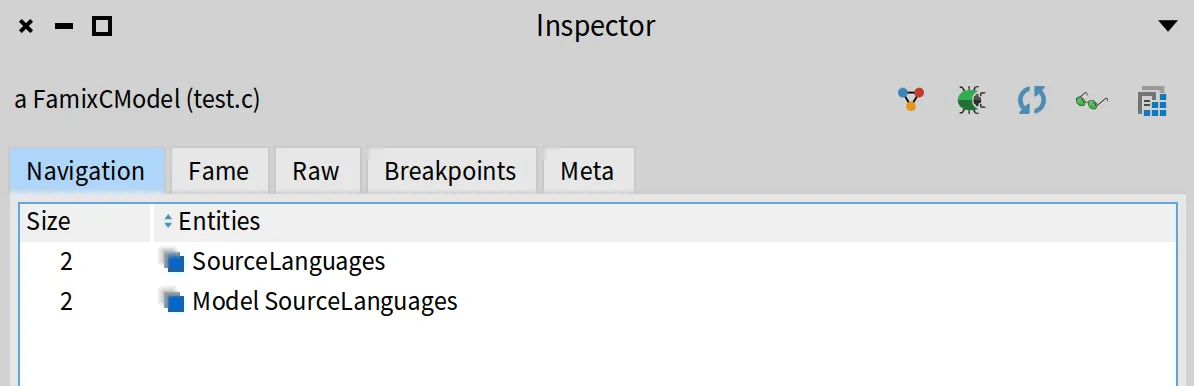
Then select all the code and run it by inspecting it (cmd + I or click the “Inspect” button). You will get something similar to this.
The above screenshot shows what is inside our model. We can see that there is pretty much nothing there yet apart from the SourceLanguages which is added by default by TreeSitterFamixIntegration.
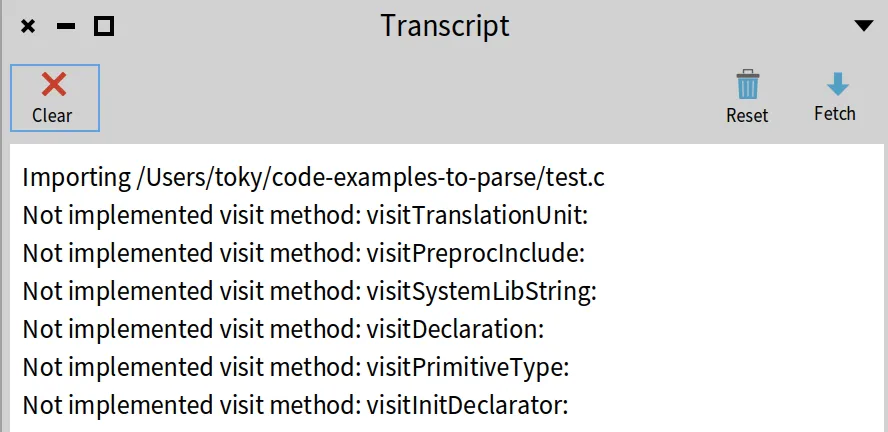
Now if we look at the Transcript, we can see that the importer has imported the file but we didn’t implement the visitor methods yet for every node in the AST, so no Famix entities were created.
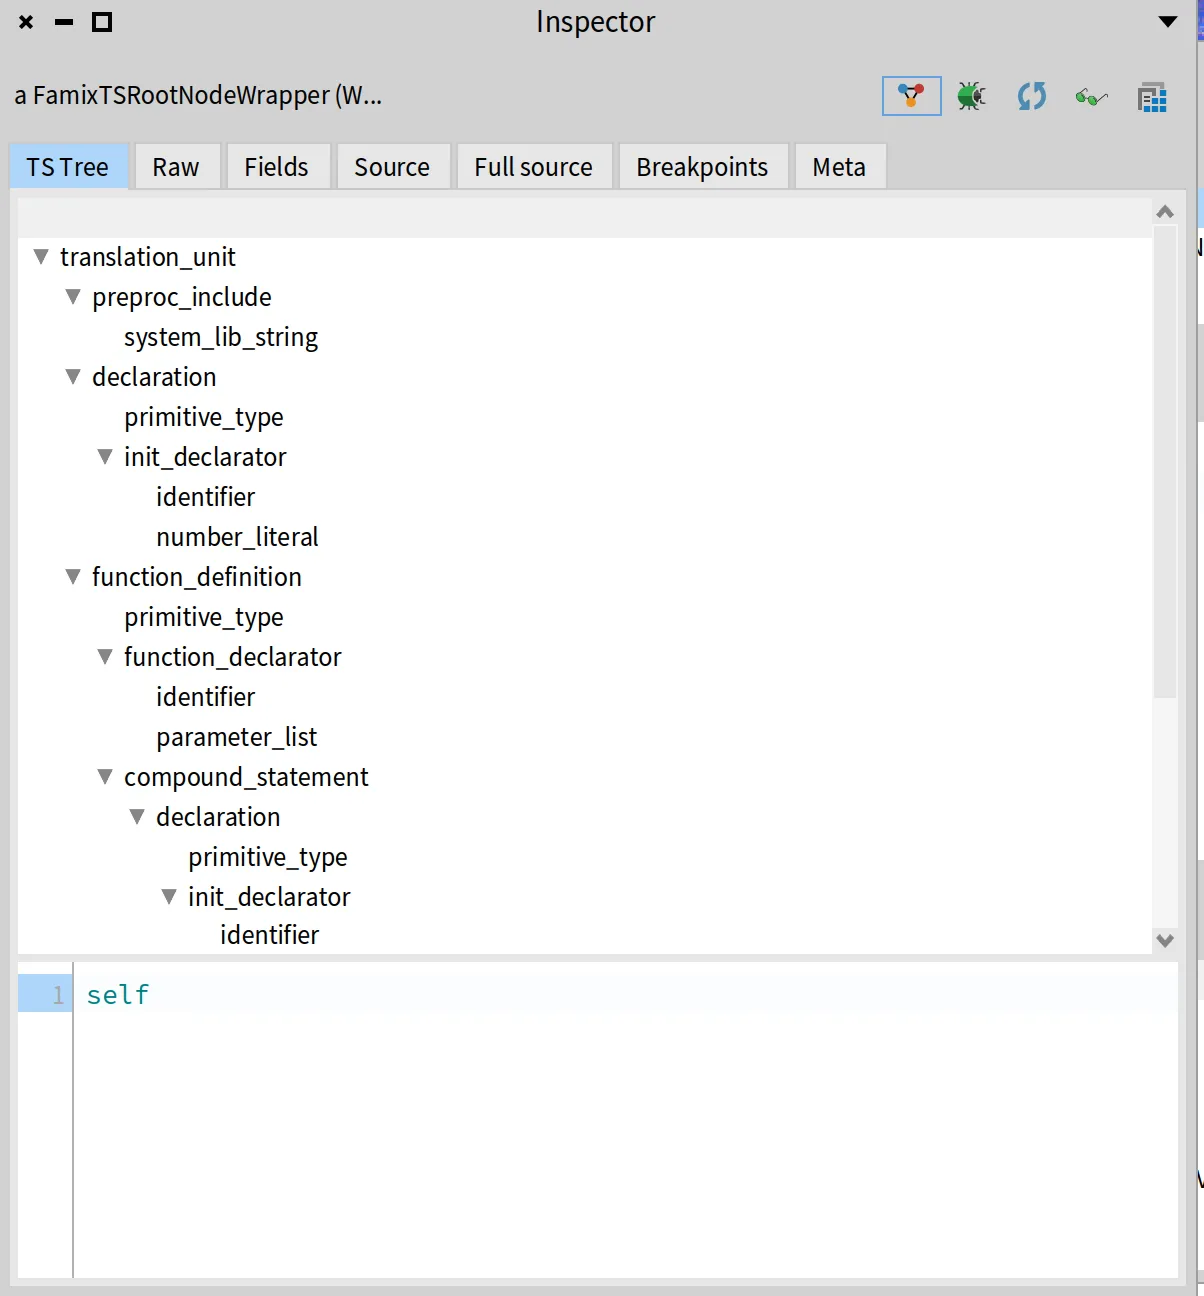
If you want to inspect the corresponding AST of our test file, you can do something similar to what is in this other blog post on tree-sitter.
Let’s go back to our FamixCImporter class and from there we will create a CompilationUnit and HeaderFile entities. We need to do that there because we have to check if the file is a header file or a source file.
visitor model newCompilationUnitNamed: aFileReference basename.
]
ifFalse: [
visitor model newHeaderFileNamed: aFileReference basename.
].
visitor
useCurrentEntity: fileEntity
during: [ self importFile: aFileReference ] ]
ifFalse: [
aFileReference children do: [ :each|
self importFileReference: each
].
^self ]
We use the useCurrentEntity:during: to provide a context for the visitor. This is same as pushing the fileEntity to a context, visit children and then popping it from the context. And it will set the current entity to the fileEntity.
Now try importing a whole directory containing C files. You should see that the importer creates a FamixCHeaderFile for each header file and a FamixCCompilationUnit for each source file.
To set the source anchor for any Famix entity, we can use the setSourceAnchor: aFamixEntity from: aTSNode method provided by the FamixTSAbstractVisitor class. This method takes a Famix entity and a Tree-sitter node.
We can use it to set the source anchor for our fileEntity . Go to visitTranslationUnit: in the FamixCVisitor class and add the following code:
Next, we will create FamixCFunction entities for each function declaration in the C file. We will do this in the visitFunctionDefinition: method of the FamixCVisitor class.
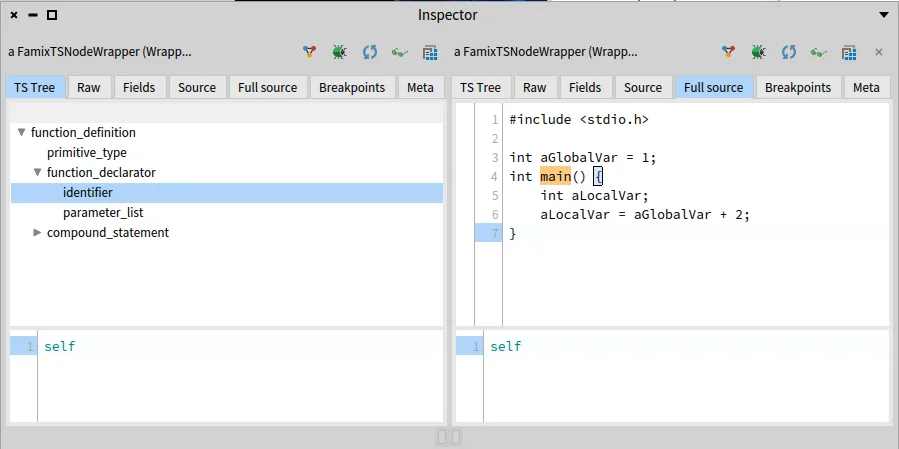
But first we need to know where the function name is located to create the FamixCFunction entity. Create the method and put a halt there to inspect the node.
visitFunctionDefinition: aNode
self halt.
self visitChildren: aNode.
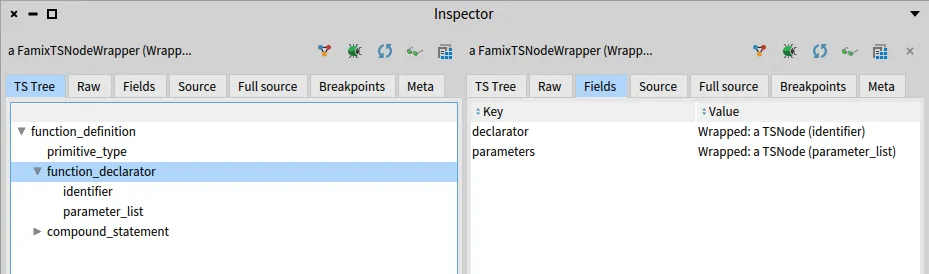
If we look at the function definition node, we can see that the function name is in the identifier node, which is a child of the function declarator node.
To get that name, there are two ways:
visit the function_declarator until the identifier returns its name using self visit: aNode
get it by child field name using aNode _fieldName that returns the child node with the given field name. And you don’t need to implement the _fieldName method because it is already handled by the framework.
For simplicity, and to show other available features in the framework, we will use the second way.
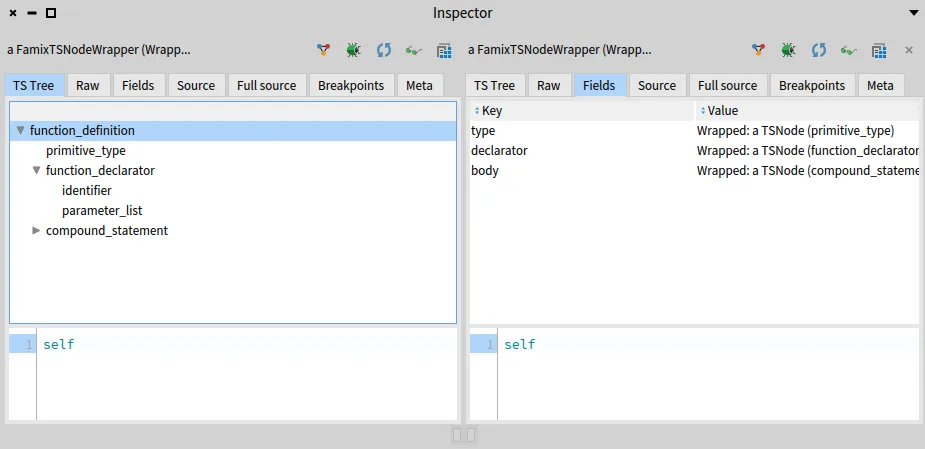
Let’s inspect the function definition node to see what fields it has.
So if we do aNode _declarator it will return the function declarator node
And if we do aNode _declarator from the function_declarator it will give us the identifier that we want.
Now we can create the function entity and set its name and source anchor.
The self currentEntity returns the compilation unit entity which is the parent of the function entity.
And before visiting the children, we set the current entity to the newly created function entity using useCurrentEntity:during:. This will allow us to create other entities that are related to this function, such as parameters and local variables.
The difference between local and global variables is that local variables are declared inside a function, while global variables are declared outside any function.
To create the variable entities, we will create the visitDeclaration: method in the FamixCVisitor class. This method is called for each variable declaration in the C file.
FamixCVisitor >> visitDeclaration: aNode
"fields: type - declarator"
| varNameentity |
self visit: aNode _type.
varName :=self visit: aNode _declarator.
entity :=self currentEntity isFunction
ifTrue: [
(model newLocalVariableNamed: varName)
parentBehaviouralEntity: self currentEntity;
yourself ]
ifFalse: [
(model newGlobalVariableNamed: varName)
parentScope: self currentEntity;
yourself ].
self setSourceAnchor: entity from: aNode.
The visitDeclaration: method does the following:
Visits the variable’s type. This will allow us to parse its type information.
Retrieves the variable name by visiting the declarator field. If the variable is initialized, this will be an init_declarator node; otherwise, it will be an identifier. We should implement visit methods for both cases to extract the name correctly.
FamixCVisitor >> visitInitDeclarator: aNode
"fields: declarator - value"
self visit: aNode _value.
^self visit: aNode _declarator "variable name is in the declarator node"
FamixCVisitor >> visitIdentifier: aNode
    ^ aNode sourceText "returns the name of the variable"
Creates a variable entity, either a local variable or a global variable, depending on whether the current entity is a function or not.
Sets the source anchor for the variable entity using the setSourceAnchor:from: method.
In this section, we will implement the symbol resolution for our C importer. This will allow us to resolve references to variables and functions in our C code.
As an example, we will resolve the reference to the local variable aLocalVar in the main function, which will be represented as a famix write access entity.
To create the write access entity, we will implement the visitAssignmentExpression: method in the FamixCVisitor class. This method is called for each assignment expression.
visitAssignmentExpression: aNode
"fields: left - right"
| accessleftVarName |
leftVarName :=self visit: aNode _left.
access := model newAccess accessor: self currentEntity;
The resolve: aResolvable foundAction: aBlockClosure method is provided by the FamixTSAbstractVisitor class.
It takes two arguments:
aResolvable: an instance of SRIdentifierResolvable. This resolvable is created with the identifier (the variable name) and the expected kinds of entities (in this case, either a local variable or a global variable). The identifier: method sets the identifier to resolve, and the expectedKind: method sets the expected kinds of entities that can be resolved.
aBlockClosure: a block that will be executed when the resolvable is resolved (we found the variable). In this case we set the variable of the access entity to the resolved variable.
The SRIdentifierResolvable is a generic resolver that can be used to resolve identifiers. However, in some cases, we may need to create a custom resolver to handle specific cases. In that case, we can create a class that inherits from SRResolvable and override the resolveInScope:currentEntity: method to implement our custom resolution logic.
For more information about the symbol resolver, you can check the documentation.
The TreeSitterFamixIntegration package provides a utility to parse comments and attach them to the corresponding Famix entities. This is done using the FamixCCommentVisitor class.
To parse comments, we will create the FamixCCommentVisitor class that will inherit from FamixTSAbstractCommentVisitor. And we just need to override the visitNode: method.
We use the addMultilineCommentNode: and addSingleLineCommentNode: methods provided by the FamixTSAbstractCommentVisitor class to add the comment to the model.
For a detailed explanation of how to use the comment visitor, you can check the documentation.
Last thing to do is to use the comment visitor somewhere in our importer. We can do that everytime we finish visiting every children of translation unit node.
In this blog post, we have seen how to build a Famix importer for C code using the TreeSitterFamixIntegration framework. We have covered the following topics:
Setting up the environment and creating the importer and visitor classes.
Creating Famix entities for compilation units, functions, and variables.
Implementing symbol resolution for local and global variables.
Parsing comments and attaching them to the corresponding Famix entities.
This is just a starting point for building an importer with this stack. You have to implement more tests and methods to handle other entities. The TreeSitterFamixIntegration framework provides a lot of other utilities we didn’t cover to help you with that.


 And if we do