Manage rules using MooseCritics
Software projects often leave specific architectural or programming rules that are not checked by the off-the-shelf static analysis tools and linters.
But MooseCritics is now here to make such things easy!
Setting up for rule making
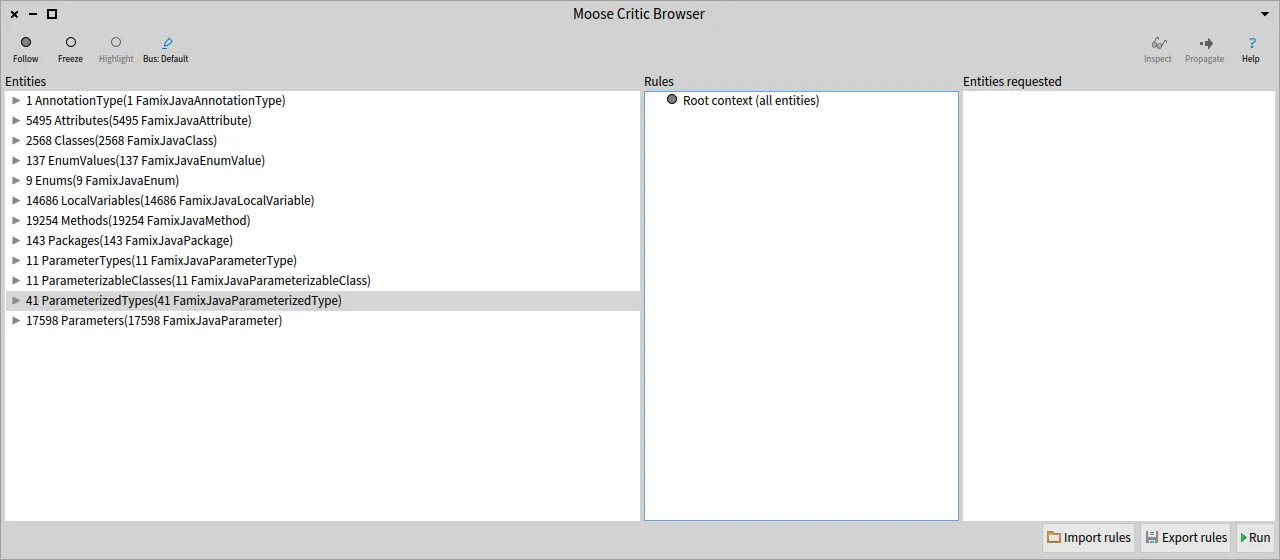
Section titled “Setting up for rule making”The first step to use this tool is of course to open its browser, findable in the Moose menu under the name Moose Critic Browser. As with every other tool of MooseIDE, we also need to propagate a model to give our tool entities to analyze. For this analysis, we will use a model of ArgoUML, an open-source Java project used in this wiki.
Rules and how to write them
Section titled “Rules and how to write them”Rules in MooseCritics are divided into two components: Context, and Condition.
A context is a collection of entities to specify the scope of our analysis. Using this, we are only executing our rules on the relevant entities for them.
Once we have a context, we add conditions to it, to verify the validity of every entity belonging to this context.
Let’s start building a few of those, to appreciate how easy and versatile this system can be!
Contexts
Section titled “Contexts”To begin, we will right-click on the root context, the root of our rules, doing nothing but passing the whole set of entities propagated into our browser. Then, clicking on “Add Context” will open a new window, in which we can write our first context.
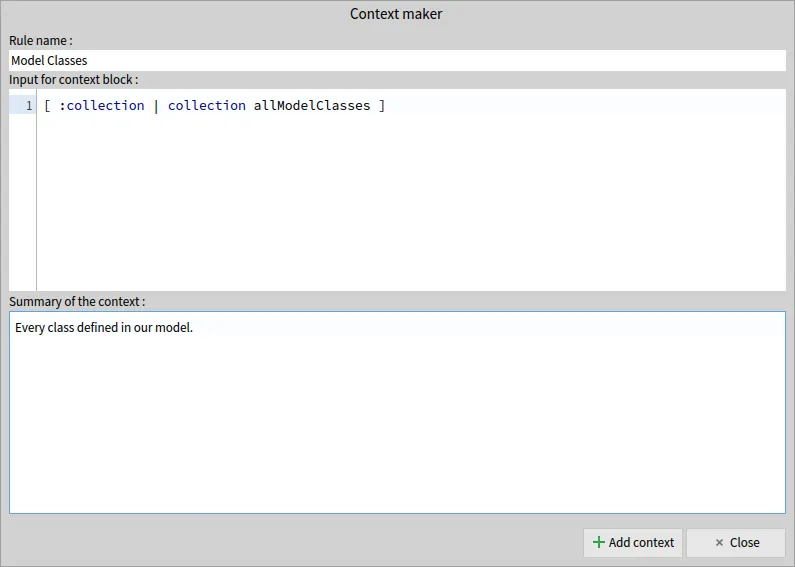
As you can see, a context has three properties :
- Name: the name of our context
- Context Block: a code block, using as a parameter the collection given by the parent context, and that must return a collection of entities
- Summary: a quick explanation of the selection performed
In this case, the selection is very basic (keeping only the classes defined within our model), but any way of manipulating a collection (so long as it remains a collection) can be used to make a very specific choice of entities.
But for now, let’s keep things simple, and add a few more contexts to our root.
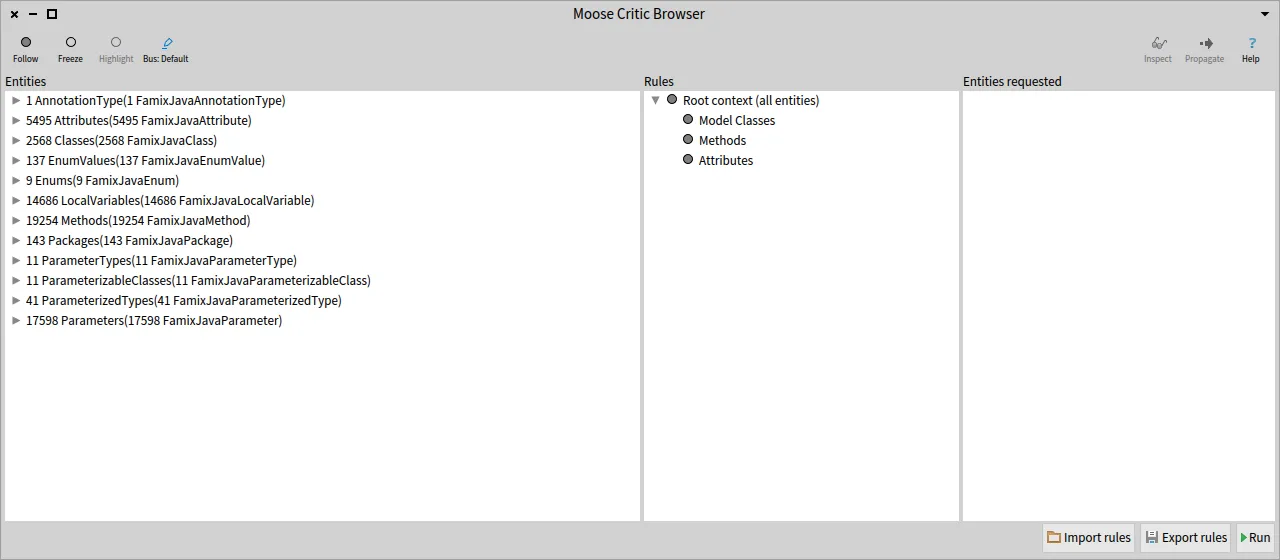
First, we select methods…
"Title:" 'Methods'"Context Block:" [ :collection | collection allMethods ]"Summary:" 'Every method in our model or called by a model entity.'… and secondly attributes.
"Title:" 'Attributes'"Context Block:" [ :collection | collection allAttributes ]"Summary:" 'Every attributes in our model or accessed by a model entity.'Once this is all done, we are met with this screen :
Conditions
Section titled “Conditions”Now that our contexts are set, we can write a few conditions for those.
To do so, right-clicking on our Model Classes context and choosing “Add condition” which will open a new interface to write our conditions.
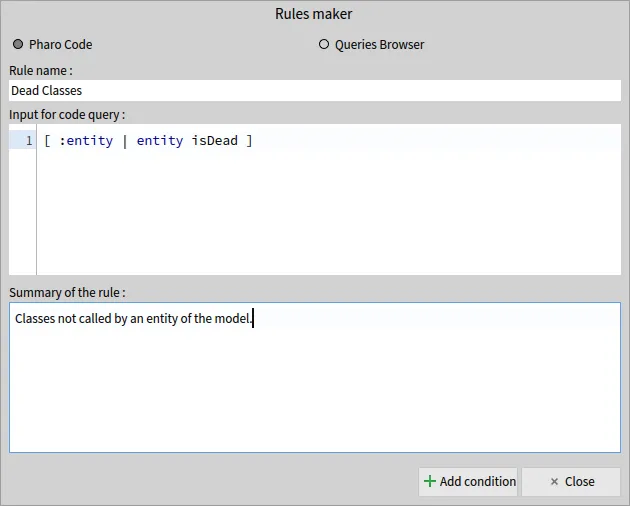
The properties are almost identical to a context, but we now use a query to know whether or not an entity violates a rule.
This query will have as a parameter every entity of our context, one by one, and will add a violation to it if the query returns true.
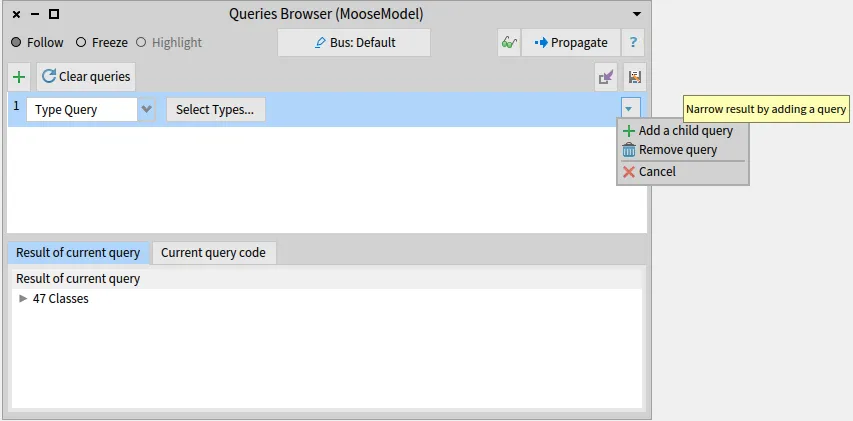
Now, the most perceptive readers (all of my readers, no doubts 😄) will have noticed the two radio buttons; Pharo Code and Queries Browser.
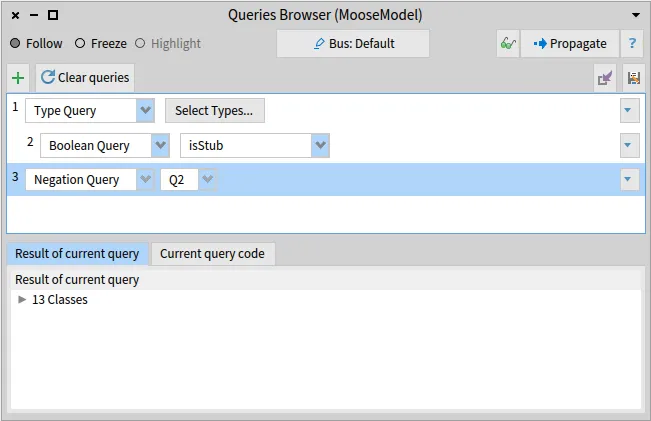
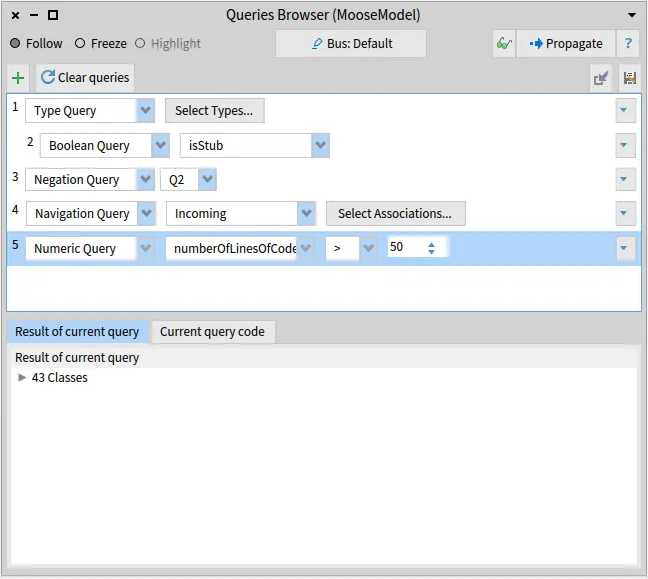
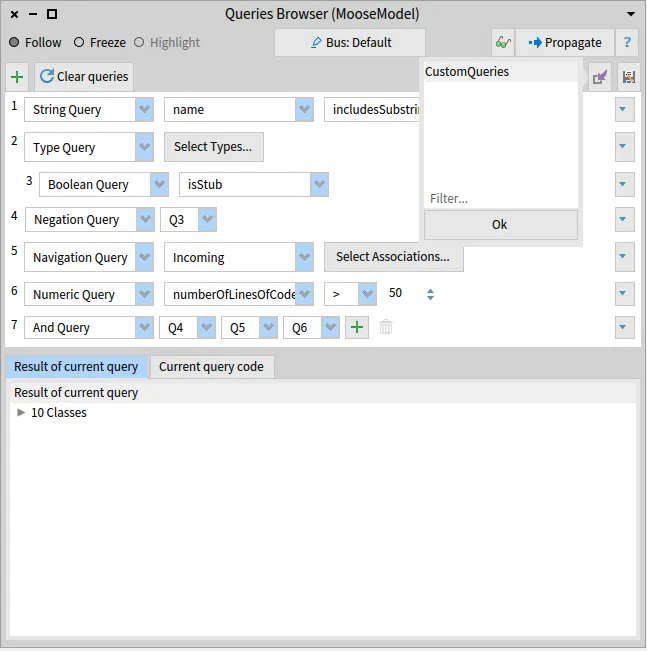
We can indeed use a query built in the Queries Browser, and we will do so for the next one, to find God Classes.
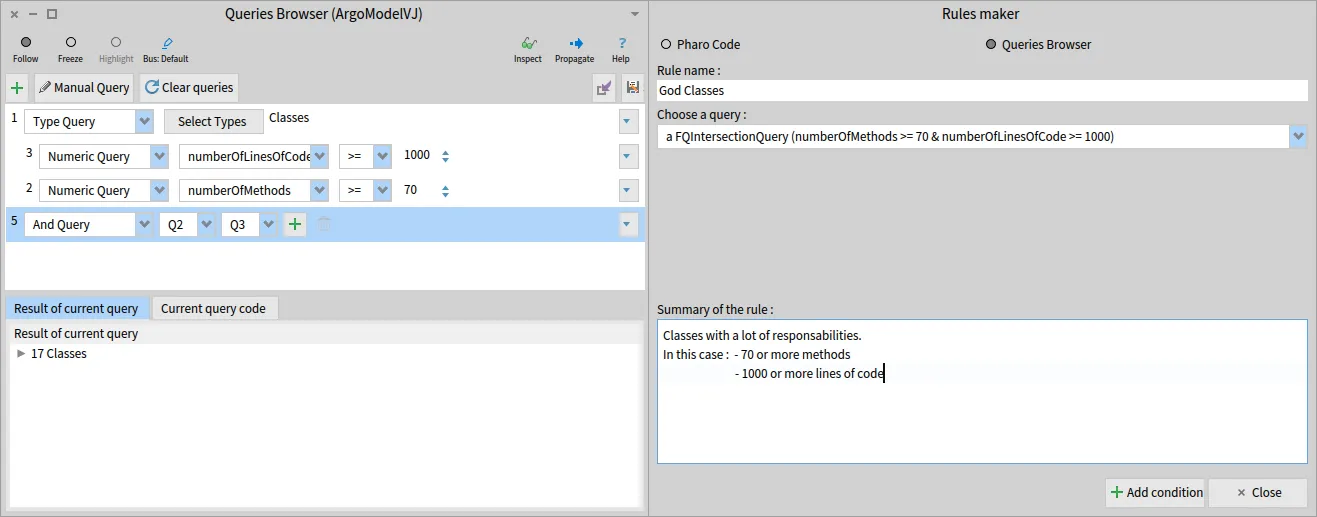
This may not be an option for every kind of rule, especially the more complex ones, but conditions verifying several simple things can be easily designed, thanks to the Queries Browser.
Now that we saw all possibilities, time to write one more condition, this time for the methods :
"Title:" 'Deprecated'"Query Block:" [ :entity | entity annotationInstances notEmpty and: [ entity annotationTypes anySatisfy: [ :a | a name = 'Deprecated' ] ] ]"Summary:" 'Deprecated methods, that should be removed or not used anymore.'We are now all set, and all that remains to do is pressing the “Run” button in the bottom right corner, and look at the result of our analysis in the right pane, showing every violation found, on the format violatingEntity -> violatedCondition.
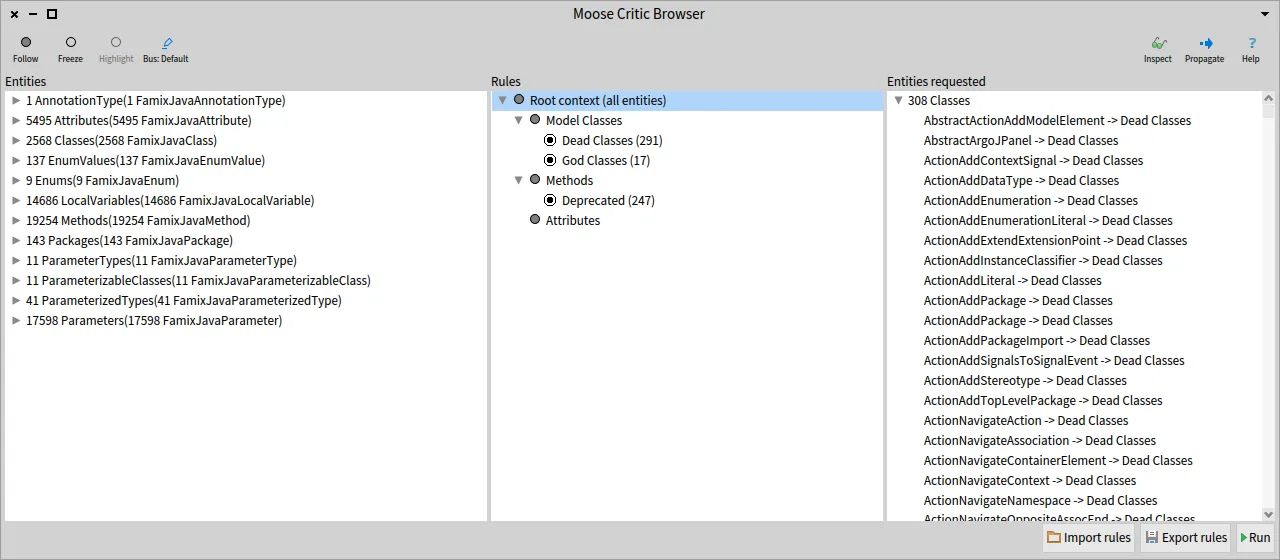
Now that we executed our rules, you can also have fun clicking on contexts and conditions to see that the left and right panels will change to match your selection, the left one showing the context, and the right one showing the violations of the selected condition, or the violations of every condition of the selected context.
Getting specific
Section titled “Getting specific”We may also be a bit more specific, both on the condition side of things, but also when it comes to context.
For the conditions, our perceptive minds did not forget about the attributes, so we will write a condition for them too :
"Title:" 'Directly accessed'"Query Block:" [ :entity | entity accessors anySatisfy: [ :m | m isGetter not and: [ m isSetter not ] ] ]"Summary:" 'Every attribute accessed without the use of a getter or setter method.'For a final rule, let’s work a bit more on our context.
Let’s say we want to build a rule around getter methods, to verify that their cyclomatic complexity is equal to 1.
For that, we can start by making a new context, using the “Methods” context as its parent :
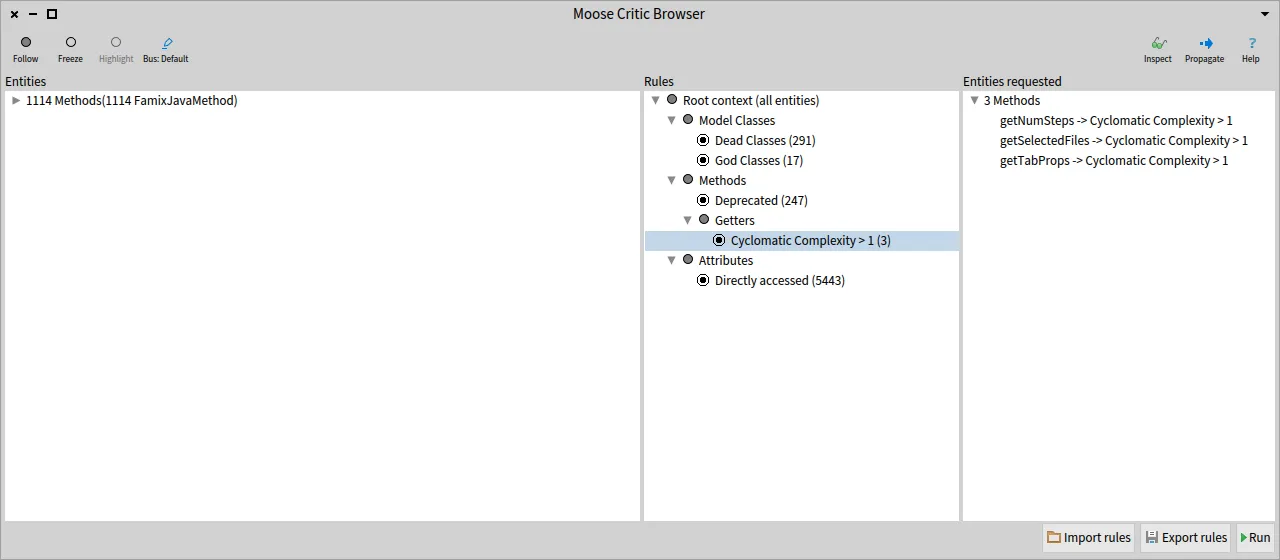
"Title:" 'Getters'"Context Block:" [ :collection | collection select: [ :m | (m name beginsWith: 'get') and: [ m isGetter ] ] ]"Summary:" 'Every getter method of our model, meaning : - Their name starts with 'get' - They have the property 'isGetter' set to true'Once that sub-context has been created, we can give it a condition to verify ! Let’s do so right away, with our cyclomatic complexity example :
"Title:" 'Cyclomatic Complexity > 1'"Query Block:" [ :entity | entity cyclomaticComplexity > 1 ]"Summary:" 'A getter must have a cyclomatic complexity of one.'We are now done with all of our rules. To get the result of our new conditions, you can use again the “Run” button, or, execute only the new ones by right-clicking on them and selecting the “Run condition” option.
Saving and loading the rules
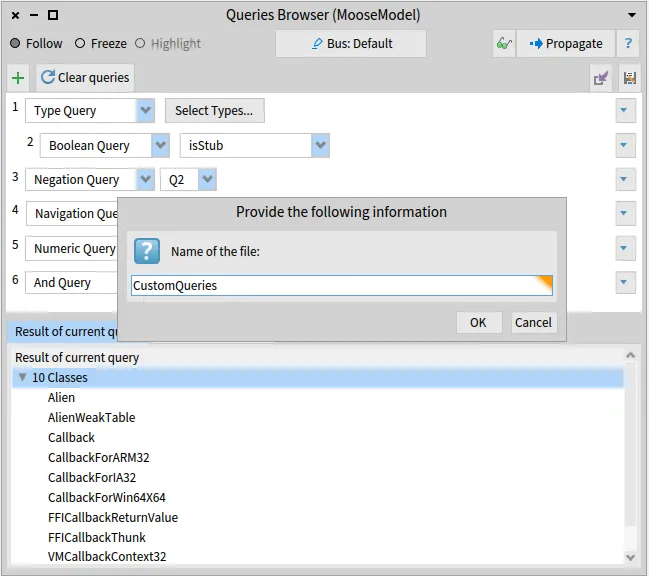
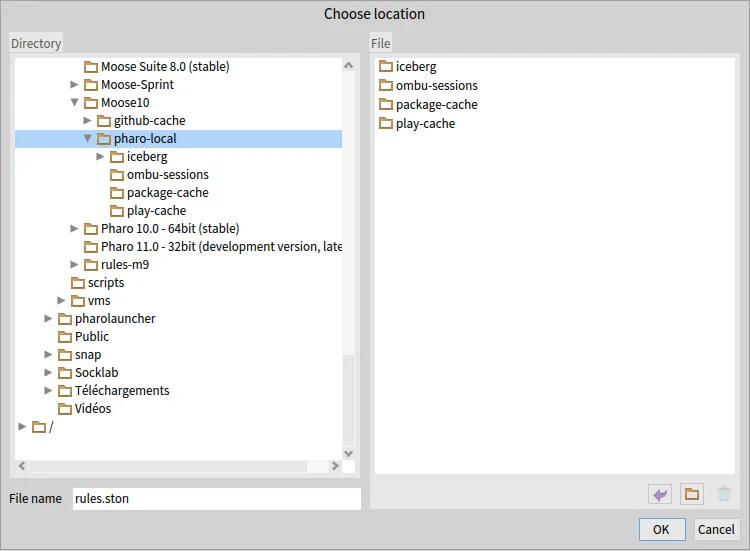
Section titled “Saving and loading the rules”Our work is now done, but we would like to be able to monitor the state of our project in the long run, and to simplify this, we can export and import sets of rules built with MooseCritics.
For that, by pressing the “Export rules” button, we can choose where we wish to save our rules. The loading works similarly and will restore the tree as it was when it was saved (if rules were already present, the imported rules are added after those).
Exporting violations
Section titled “Exporting violations”MooseCritics can also propagate those violations, in order to access them in the entities exporter, to be able to save those violations in a CSV file.
The exported selection will be the violations found in the right pane when using the propagate button.

Conclusion
Section titled “Conclusion”MooseCritics enables us to verify the validity of our defined rules and puts us in the right direction to correct our mistakes by finding violations. Dividing our model into contexts allows us to make specific analyses while working on a large scale.
Even if most of the examples shown here are fairly simple, MooseCritics can represent complex structural rules using Famix properties and will surely make your life easier when it comes to software analysis using Moose. 😄